Trello pricing and plans
Before we delve into the heart of this guide and see it in detail how to use Trello, I would say that it is necessary to make an overview of the prices and subscription plans of the service, so that you can choose the one that suits you best.
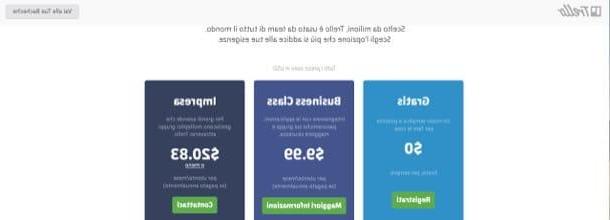
- Free - includes all the core features of Trello (boards, lists, cards, members, checklists and unlimited attachments), the ability to use a Board Power-Up and attach files up to 10MB from your computer">computer, or link any file from Google Drive, Dropbox, Box or OneDrive.
- Business Class - includes everything included in the free version of Trello. Plus it adds integration with Evernote, Github, Google Hangouts, Mailchimp, Salesforce, Slack, Google Drive, and more. It costs $ 9,99 / month (annual payment).
- firm - it includes all the functions of the previously analyzed plans and, in addition, it offers advanced tools designed for companies that need to manage large teams with personalized assistance. It costs $ 20,83 / month (annual payment).
How to create Trello accounts
As I mentioned in the introduction of the post, Trello is a service that works after registration. So let's see how to create a Trello account both from smartphones and tablets (therefore using its official app) and from computer">computers.
Smartphones and tablets
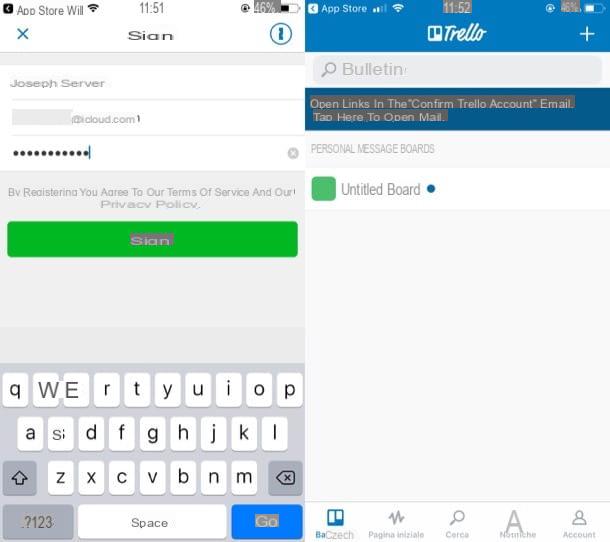
To create a Trello account from smartphone or tablet, install and start the official app of the service on your Android or iOS device, then tap on the button SUBSCRIBE, fill in the fields Full name, Email address e Password with the requested information and presses the button SUBSCRIBE.
At this point, tap on link contained in the message that was sent to the e-mail address with which you decided to register (has as object Confirm Trello account) and so you will confirm your registration.
At the end of the procedure, you can finally start using the Trello app to optimally manage your projects through its many tools. For more information on this, read the dedicated chapter.
computer">computer
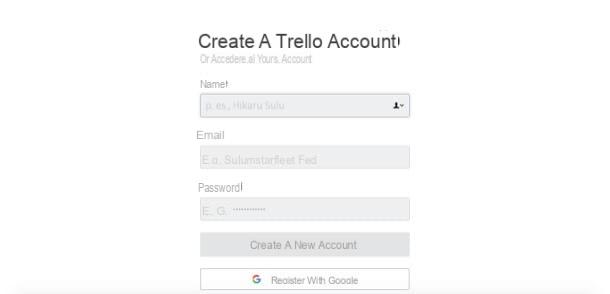
You want to create your Trello account from computer">computer? In this case, connected to the main page of the service, press the button Register - It's free and, on the next screen, fill out the form you see on the screen indicating yours Your name, yours Email and Password. Finally, click on the button Create a new account.
Within a few seconds you will receive a message to the email address you provided earlier: open it and press on link contained within it to confirm your registration. I point out that from your computer">computer you can also register on Trello through your Google account: to do so, all you have to do is press the button Sign up with Google and log into your Google account by following the on-screen instructions.
After registering on Trello, you can finally use the service by following the instructions I gave you in the dedicated chapter of this tutorial.
How to best use Trello
Now the time has finally come to see how to best use Trello and, therefore, how to create bulletin boards, lists, cards, etc., in order to organize your personal and professional projects.
Smartphones and tablets
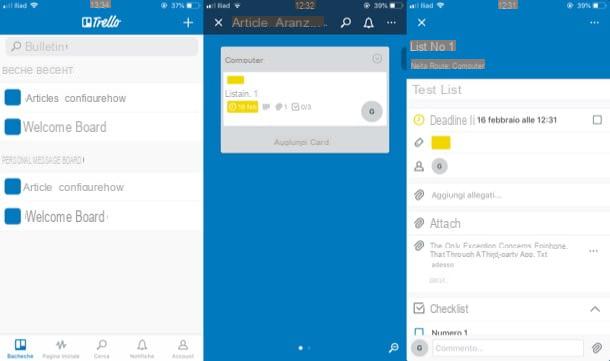
After starting Trello on your Android or iOS device and logging into your account for the first time, you will find yourself in front of the main screen of the app, containing the list of your Personal bulletin boards, that is the workspaces in which to add lists, cards and so on (since you haven't created one yet, you should only see the Welcome board).
To create a new one showcase on which to "post" your lists and your personal projects, press the button capacitor positive (+) lead at the top right and, in the screen that opens, provide the name of the new bulletin board, its visibility (eg. private, if you want to show it only to the people you eventually decide to add or Public, if you want it to be visible to everyone). Then select the color of background you prefer and tap on the item Crea at the top right.
Now it's time to enrich the newly created board by adding some list, that is the thematic columns that group files concerning the topic represented by the name of the list itself. To proceed, open the board created (in reality it should have opened by itself immediately after making it), press the button Add list, give it a name and tap on the item Add.
To the lists you have to add some cards, i.e. spaces in which to insert everything that has to do with an activity linked to the list: attachments, labels, checklists, etc. To proceed, press on the item Add tab, give a name to the created tab and confirm the operation by tapping on the item Add. You can add as many cards as you need by following the procedure just described.
Then open one of the created tabs and use the fields and menus you see in the box that appears on the screen to add one Description, a Expiration date, one or more Labels, to invite membership to view and / or modify the list, insert some attachments and so on.
If you want to move a tab to another position, know that you can do it simply by holding your finger down on it and moving it up or down (if you want to change its position within the list it is already in) or drag it within another list.
Now all you have to do is repeat the operations described in the previous lines to create all the boards and lists you need to organize your work and that of your team. It's not that complicated, is it?
computer">computer

If you want to use Trello from computer">computer, you have various options at your disposal: you can use the Web version of the service or install its desktop application, which is available in the official Microsoft and Apple stores (after going to the latter, just press the buttons Ottieni / Installa and possibly provide the Password of your Microsoft account or your Apple ID to complete the installation).
Although I will refer to the web version of Trello in the next few lines, the instructions also apply if you want to use the service's desktop application, as the interface is always the same.
For starters, log into the main Trello page and log into your account (if necessary). Then press the button Create a new board ... located in the section Personal bulletin boards, write the name of the board in the text field Add board titleselect il colore background of the same from the palette located on the right and then indicates the option of privacy preferred from the appropriate drop-down menu (you can choose between private and Public). Once this is done, press the green button Create board to go to the next step.
Now, organize the board by adding some list, that is the thematic columns in which to group the cards. To do this, after creating and opening the board, press the button (+) Add a list, give it a name by writing it in the text field that appears on the screen and click on the green button Add list.
After creating a list, you need to add some cards, that is the spaces in which to insert all the activities pertaining to the topic of the list itself (eg attachments, labels and so on). To do this, click on the item (+) Add a card appeared under the name of the list, assign a name to it and confirm the operation by clicking on the green button Add tab.
Now, open one of the created tabs by clicking on it and use the fields and menus that are shown to you in the window [Card name] to add his own Description, a Expiration date, one or more Labels, to invite membership to view and / or modify the list, insert some attachments, etc.
If you want, you can also move a tab to another position: just hold down the left mouse button on it and drag it up or down (if you want to change its position within the list it is already in) or drag it into another list.
How to create Trello workgroups
One of the most important features of Trello is the creation of working groups, through which to allow other users to actively collaborate on projects by commenting on them, making changes to the boards and so on. Be aware, though, that the actual creation of groups can only be done from the web and desktop versions of Trello.
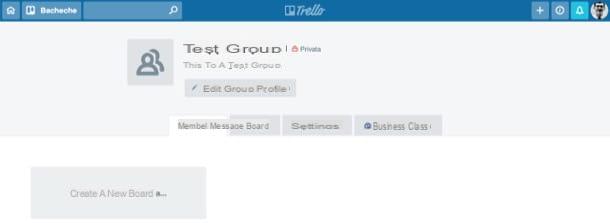
After logging into your Trello account from its home page or from its application for Windows 10 or macOS, click on the button (+) Create a group located on the top left, give a name it's a Description to the group by filling in the text fields in the box that appears on the left and presses the button Crea.
On the page that opens, select one of the available tabs to make various changes to the group: Dashboard, to add and manage shared message boards on the group; Members, to add and / or remove users in the group (to do this, just click on the button Invite group members and enter the name or l 'email address of the user you wish to invite); Settings, to manage the settings of the group and choose its visibility and set any restrictions for the various participants.
When a user is invited to a group, they will receive an email containing a link: by clicking on it, you will be able to access the latter (obviously after creating a Trello account) and will be able to modify the boards and lists present within them (based on the restrictions you decide to grant to each participant).
Members who are part of a group will be able to interact with other users via the comments function, which is activated by opening a work sheet and calling the function via the text field Write a comment ... / Comment ... located in the tab itself.
In case of dubbi or problem
If you have any doubts or problems regarding the functioning of Trello, or if you simply want to deepen other specific functions of the service, I suggest you consult the official guide you find on this page.
To easily identify the topic you are interested in clarifying or deepening, all you have to do is select it from the index located on the right and then follow the instructions provided in the guide.
How to use Trello