Preliminary information
Before getting to the heart of the tutorial, let me give you some advice that I am sure will be useful for you to deal with the procedures that I am about to illustrate. Disassembling a fixed PC, in fact, is an operation that, although not particularly difficult, requires attention in some of its parts.
First, make sure you are using the right tools - in general, I recommend that you get a Phillips screwdriver and a flat-blade screwdriver, so you can act on different types of screws without finding yourself unprepared. If possible, keep multiple, multi-sized screwdrivers close to you. In this regard, you can buy special kits, easily available online and in specialized stores.
See offer on Amazon See offer on Amazon
Also remember to never force connectors or covers, in order to avoid the risk of damaging the components connected to them. If you find it particularly difficult to act on a component, always check that you have freed it from screws or parts designed to keep it fixed.
Finally, keep in mind that the computer is like any other electronic machine or household appliance: before acting on it, do not forget to disconnect the power from the power supply and to turn off the dispensing button, if present. This will reduce the risk of getting hurt or causing unwanted discharges to zero.
How to take apart a PC
Now that you have all the essential information at your disposal, stop the chatter and let's get started! In the next chapters I will explain you in detail how to take apart a PC, both fixed and portable, with all the significant differences of the case and providing you with links - on the names of the various components - which will refer you to further information on the latter and advice on purchasing (in case you want to replace them). Let's begin!
How to take apart a desktop PC
If you want disassemble a fixed PC, know that the operation is quite simple. Although the PC can be a relatively complex machine, in fact, the disassembly and replacement of parts has always been made quite simple by the manufacturers. This, at least, is true for classic desktop computers consisting of separate case and monitor; the speech is distinctly different for i PC all-in-one, those that include everything in the monitor, which can be more or less simple to disassemble and update, depending on the choices made by the manufacturer.
Returning to the classic PCs with separate cases, I'll tell you more: the shape and arrangement of the internal components is generally standardized, to the point that the instructions I'm about to give you should be valid for almost all desktop computer models on the market. With that clarified, let's really get started!
First of all, disconnect all cables connected to your PC: USB cables, audio cables and, above all, power cable must not be connected in any way during this operation. Also make sure to turn off the power supply switch to quickly discharge the internal capacitors of the PC and avoid residual electrical current during disassembly.
Time turn the PC sideways, so that you have the right side of the car. If you are not sure if you have the correct side in front of you, locate the screws on the back of the PC: those on the side you are interested in are generally larger and, at times, can even be unscrewed by hand. When you are done, proceed and unscrew the rear screws of the side shell and push the side panel slightly so that it slides: if you have released all the screws correctly, the panel will have no difficulty in sliding.
Once the side panel is removed, you can take a look inside the PC. If you have removed the right panel, you will find all the components mounted on the motherboard and that make the PC work, so you will have a rather easy room for maneuver.
On the contrary, if you have removed the opposite panel you will find yourself in front of some cables and on the back of the motherboard, enclosed in a metal frame. In this case, screw the panel back into place and remove the opposite side panel.
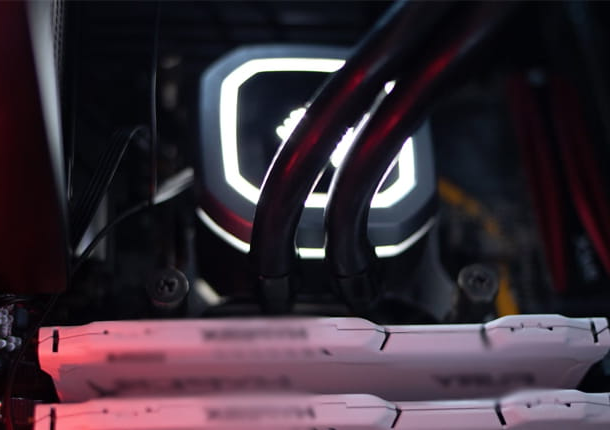
If you are wondering what the various components you see are, don't worry: I'll explain it to you immediately. The processor it is normally found in a central position, surmounted by the heatsink metal often equipped with a fan or cables containing liquid, in the case of liquid-cooled configurations.
If you want to remove it, pay close attention and, after reading the model, strictly follow the manufacturer's instructions (you can also do a Google search for this purpose). It is in fact one of the most delicate parts of the entire PC.
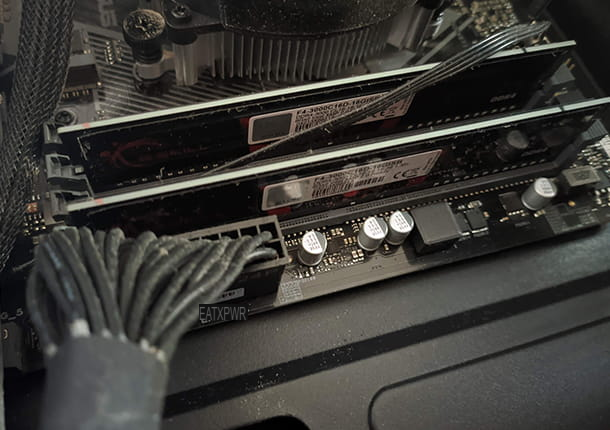
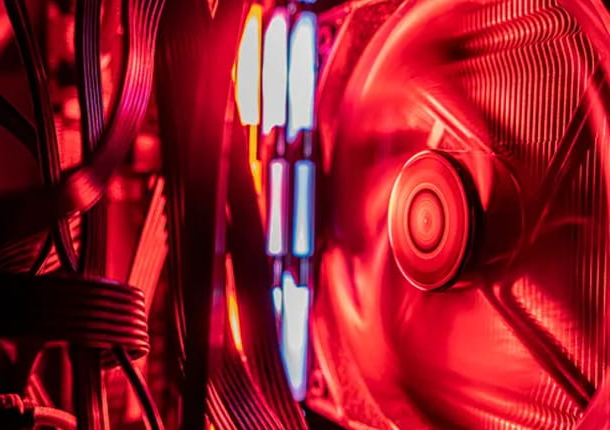
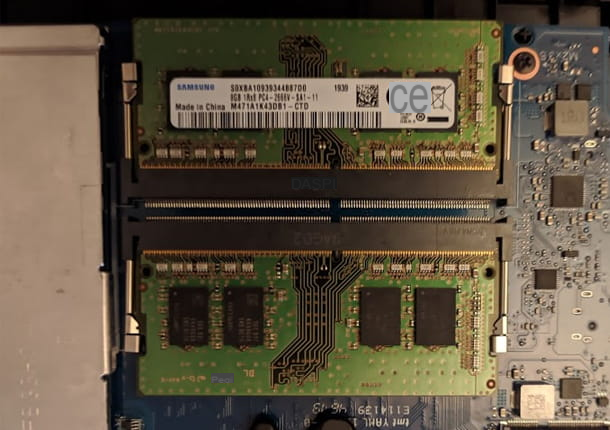
Next to the processor, you can see some rectangular cards inserted in longitudinal supports: these are the banks of RAM, which you can replace once you have taken note of the model.
Generally, you only need to take them apart apply light pressure on the supports on the sides of the RAM, which hold it in place, and remove the banks gently. Remember, however, that not all RAMs are the same, so always pay attention to the type indicated on the benches themselves before attempting a replacement: you can find all the details in this tutorial of mine.
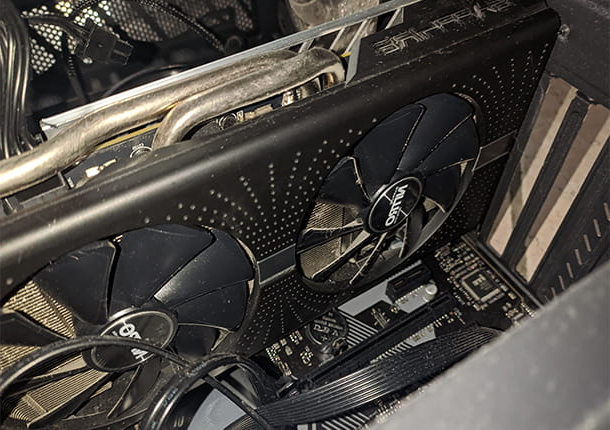
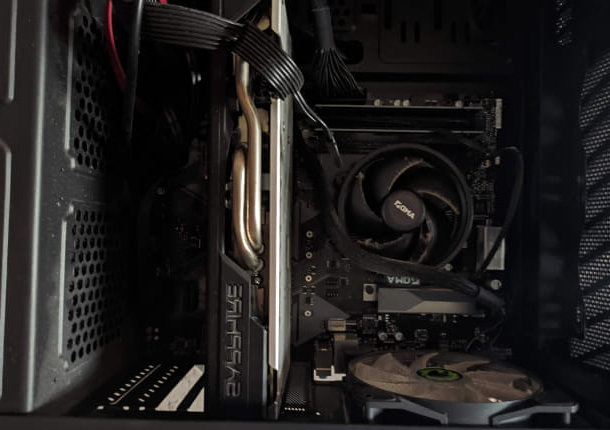
If your desktop PC has a Graphic card dedicated, you can find it in one of the bays, called PCI Express, near the back of the computer. You can easily recognize it, as it is one of the most noticeable and bulky parts of the machine.
If you intend to remove it, first of all unscrew the screw located in the upper front part of the video card, e pry up the rear support holding the card fixed on the slot. The same operations apply to any other card connected in this way.
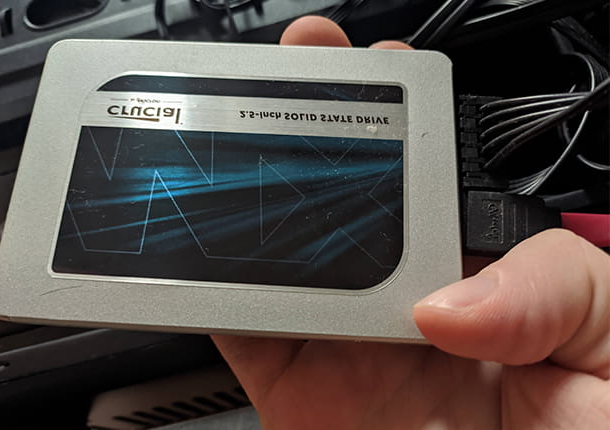
In case you want to replace or add a hard drive or SSD, the first thing you need to do is locate its location. Generally, hard drives are placed in the back of the PC, often protected by a metal enclosure. You can recognize them as there are two cables on the back of them, one with a wider connector and one with a narrow connector. The latter is the cable SATA which connects directly to the motherboard, while the cable from the larger connector is the power cord and connects to the power supply.
Once the two cables are disconnected, proceed and unscrew the screws on both sides of the disc to allow it to slide and remove it. Do not apply too much force: if you have released all the screws, the disc will not put up much resistance. Remember that in some cases, if an SSD is present, you may find it on the opposite side of the PC. In this case, also remove the opposite side panel to reveal its position and proceed with the operation. For more information on this, see my guide on how to mount a hard drive or how to switch from hard drive to SSD.
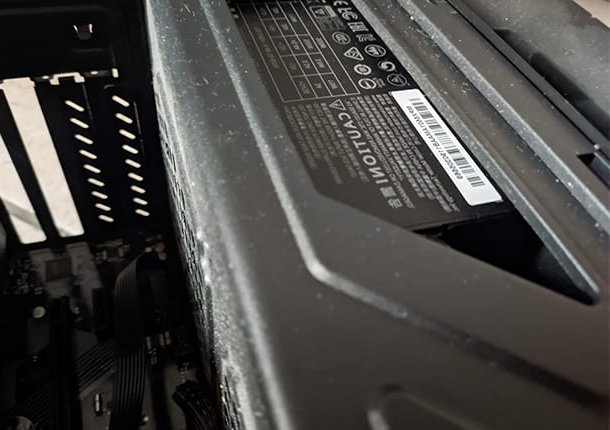
If your goal is to operate onpower pack, first of all individual: it is the component from which most of the cables depart, and is almost always placed on the back side of the PC.
Now that you've spotted it, disconnect gently all the connectors that start from it and that are inserted on the motherboard and in the various components. Only when you are sure you have disconnected all of them, proceed and unscrew the screws of the power supply, present on the outside rear of your PC. Be very careful to hold the power supply firmly with your hand, to avoid accidental falls. Once this is done, simply slide the power supply out to take it out.
How to take apart a laptop
If your intention is to take apart a laptop, you are probably thinking about upgrading some module: add more RAM, change a disk or clean the fans of accumulated dust. Unlike a desktop PC, however, the laptop has some complications.
You must know, in fact, that disassembling a portable PC means acting on a very compact device, in which the components are wisely arranged so as to take up as little space as possible without overheating. In this sense, if you are taking apart a laptop you have to expect more limited room for maneuver.
Also, keep in mind that many modern laptops, especially MacBooks and many ultrabooks with Windows, have many components soldered to the motherboard and, therefore, it is not possible to upgrade them by changing disk, RAM, etc. Do an online search for your notebook model before trying to disassemble it, please!
In any case, first turn the laptop over so you can see the back side. Now, locate the screws generally found along the edges - be careful looking for them, as some may be hidden under the grommets to protect them. Unscrew them, and put them in a container so you don't lose them.
Now, apply light pressure so that you pry up the sides of the laptop. Do not use too much force: if you have removed all the screws correctly, you do not need to insist too much. Once the back cover has lifted slightly, proceed to gently lift the entire rear perimeter of the computer.
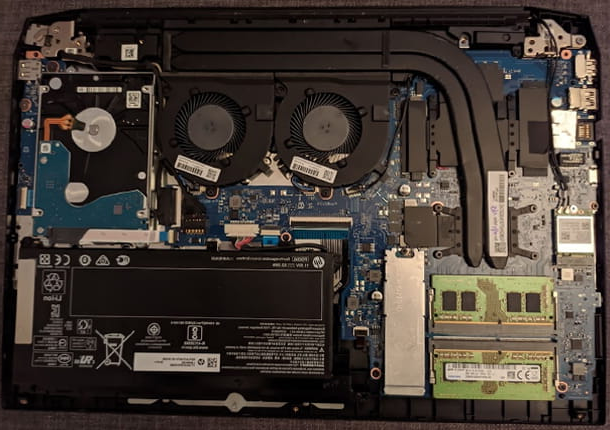
With the rear body removed, what you are looking at in front of you is the internal components of your laptop. If you want to proceed with the separation of the internal components, I advise you to pay extreme attention: as I explained earlier, in fact, the compactness of a laptop makes it very delicate. Remove the heatsink or the internal video card, for example, are operations not recommended as these are non-replaceable components.
Although laptops are difficult to disassemble, some components such as memory RAM or l 'hard drive they are often meant to be removed or replaced. But make sure to follow the manufacturer's instructions: each model, in fact, has its own particularities and presents different configurations. Proceed only if you know what you are doing, always keeping in mind the advice I gave you in the opening chapter.
I take no responsibility for any damage you cause to your computer, mind you.
How to take apart a PC