Prices and requirements

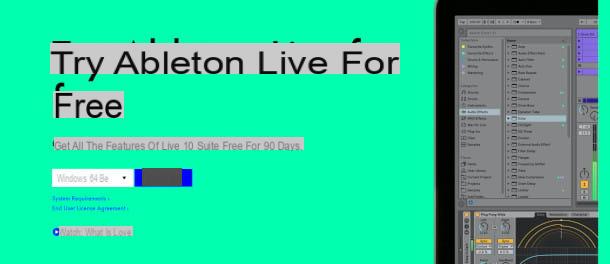
At the time of writing, Ableton Live is available in two versions: Ableton Live 10 e Ableton Live 11. Version 10 is free to download, complete with all features, for a 90-day trial period (for this I will cover this version in detail during the tutorial).
You can also choose to buy it immediately, choosing from one of these three editions: Live 10 Intro (with essential features) for around 79 euros, Live 10 Standard (complete with all the features and an extra selection of sounds, software instruments, effects) for around 349 euros e Live 10 Suite (complete with all the features and all the extras available) at around 599 euros.
The purchase of one of these editions entitles you to a free upgrade to Ableton Live 11, which integrates a number of very interesting features. However, the basic ones remain the same, so I suggest you continue reading if you want to learn how to use Ableton Live 11, whether you want to learn how to use Ableton Live 10.
Before starting I recommend that you check that the hardware and software requirements of your computer are compatible with the specifications indicated by the parent company. The minimum configuration of a PC Windows has the following requirements.
- Operating System: Windows 7 (Windows 10 recommended).
- Processor: 64-bit Intel or AMD.
- RAM: 4 GB.
- Video resolution: 1366 x 768 pixel.
- Audio card: Compatible with ASIO standards.
- Hard Disk: 3 GB of space for basic installation (but it is recommended to have at least 76 GB available to download additional audio content).
However, the requirements become higher in case you want to upgrade to Ableton Live 11, for which they are needed Windows 10, a processor Intel i5 or AMD multi-core e 8 GB of RAM.
If you own a Mac, for the version of Ableton Live 10 the minimum requirements are those that you find below.
- Operating System: macOS 10.11.6 or later.
- Processor: Intel Core 2 Duo (better i5).
- RAM: 4 GB (8 GB recommended).
- Video resolution: 1280 x 800 pixel.
- Audio card: Compatible with CORE AUDIO standards.
- Hard Disk: 3 GB of space for basic installation (but it is recommended to have at least 76 GB available to download additional audio content).
Also for Ableton Live 11 on Mac the minimum requirements change and we start with an operating system macOS 10.13, processor Intel Core i5 e 8 GB of RAM.
How to download and install Ableton Live
Let us now how to download and install Ableton Live. The procedure is very simple: first connect to the trial version download page, choose your operating system from Windows e MacOS and wait for the data to download.
You are now ready to install: if you use Windows, double-click the executable Setup.msi, then, in the window that opens, click on the button Next. Then accept the license agreement, by checking the appropriate box, and click again on Next twice. Now press the button install and, in the next window, press the button Yes. Once the installation is finished, click on Finish and the program will start automatically.
If you have one Mac, the operation is just as easy. You must, in fact, double-click on the file .dmg just downloaded and, in the window that opens automatically, drag the icon of Ableton Live to the link to the folder of Applications. Once done, you can start the program from the Launchpad or from the Applications folder itself.
At the first start of the trial version of Ableton a window opens in which the button is present Start your free trial: by clicking on it you will access the registration page of the Ableton site, where you will have to enter the data Email, Password, First Name (name is Country (Village).
You will also have to accept the Privacy Policy, by checking the box. To finish, you will have to click on the button Create Account, in order to unlock the evaluation period.
How Ableton Live works

Once you start Ableton Live, you will notice the presence of numerous buttons and several panes. At first glance, the screen may seem rather articulated and complex, but do not worry: in reality, once you have learned the basics, everything will be much easier than expected and, in a short time, you will understand how Ableton Live works.
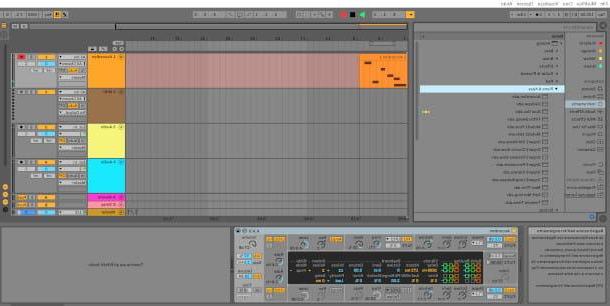
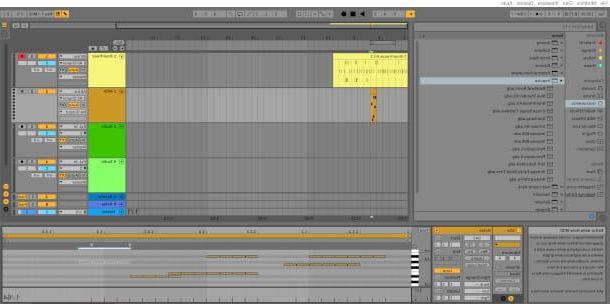
In the center is the main section of the program, where the Tracks and where can you adjust the mix. The first thing you need to know is that there are two ways of displaying this screen, which can be alternated: Session View e View Arrangement. To switch from one view to another, simply press Tab on the keyboard, go to the menu View> Toggle Arrangement / Session view, top left.
La Session View it is the one that appears at the first start of the program and is mostly used for live performances and for DJ projects, allowing you to record, reproduce and mix the various tracks quickly.
La View ArrangementInstead, it represents the multi-track recording and editing environment and probably, if you have used other programs of this type before, it will seem more familiar to you, with the classic vertical arrangement of the tracks and horizontal of the time.
The other sections present in Ableton Live are the following.
- Control Bar: located above the center screen and below the menu. From here you can act, for example, on the Stop, Play, Record buttons, but also on the metronome and MIDI settings.
- Browser: located on the left of the main screen. From here you can access all the libraries of sounds, MIDI instruments, plugins and effects.
- Device View and Effects View: are the windows that dynamically open under the main screen every time you load a sound, a plugin or an effect from the Browser.
- Info window: it is a small box, located in the lower left corner of the screen, which provides information on the various buttons when you pass over them with the cursor.
- Help window: on the right of the main screen, it offers some tutorials and an explanation of various procedures. It can be removed to make room for the main screen by clicking on X at the top left of the box.
Configure audio inputs and outputs
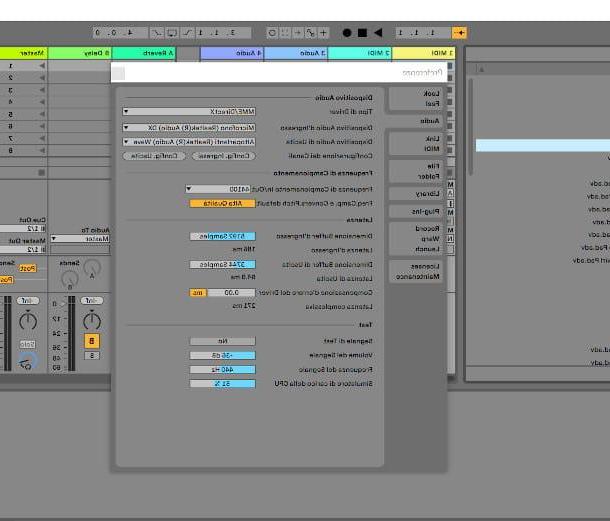
Before we begin to see how Ableton Live works, it is essential configure audio inputs and outputs. To access the configuration screen from a PC Windows, select the menu Options> Preferences that you find at the top left. If you have a Mac, however, the voice Pref Renze can be found in the menu Live (always at the top).
Now, to the voice Audio, in the field Audio Devices, select the driver type. Ableton Live for Windows supports two types of audio drivers: ASIO e MME / DirectX. MME / DirectX drivers are the default ones, but provide limited performance. ASIO is the best choice for professional audio: I therefore recommend that you select it, if available from the drop-down menu. Up MacOSinstead, the choice must necessarily be CoreAudio. If you do not find this entry, presumably your sound card is not compatible with these standards or is not properly connected.
Only after selecting the driver type will you be able to define the following items, that is Audio Input Device e Audio Output Device, then selecting the actual sound card, from the drop-down menu on the side. If you are interested in learning more about sound cards, I recommend that you read my buying guide on the best sound cards.
Another important parameter is that relating to Sampling rate. Normally, this value is set to 44.100 Hz and I advise you to keep it that way. Keep in mind that higher values require more use of the CPU and if you don't have a powerful enough processor, you risk compromising the quality of your recordings.
Play the software instruments
- software tools they are sound libraries MIDI which can be played via a External MIDI controller or via the computer keyboard itself. The latter can be activated by clicking the relative button at the top right, in the Control Bar, marked by the icon of keys of a piano. In this regard, I would like to point out that every time you move the mouse cursor over a button, at the bottom left, in the box Info window, the explanation of its functions appears. Convenient, right?
Ableton Live has a truly remarkable catalog of sounds: playing software instruments with this program is really a lot of fun and stimulating. To get started go to the section Browser, on the left, and click on the item Instruments. Now, in the window on the side, you will find them grouped into various categories, for each type of instrument.
By pressing, for example, on the item Analog you will see several analog instruments listed. To try an analog piano, therefore, select one of those proposed in the subcategory Piano & Keys, with extension * .adv o * .adg. You will hear a preview of the sound in question: if you like it, to activate it, drag it to the right in a track marked with the words MIDI. After releasing the mouse click the preset of the instrument in a special window at the bottom, in the section Devices view. From here you can change the sound parameters as you wish.
At this point you can start playing, always checking that the track is, as they say in technical jargon, Army. But how do you "arm" a track? It's very simple: you just need to make sure the button Weapon Registration, characterized by a white note inside a black dot, present in the mixer area, is active (red color). Generally, the track "arms" itself automatically when you drag an instrument, but it is always good to check that this has actually happened.
Also in the left menu you will find, in addition to the Instruments, a very rich catalog of libraries, including Sounds, Drums, Audio Effects, Midi Effects e Plug-in. To test them use the same procedure just seen for software instruments and have fun combining sounds and effects in the same track. You will be fascinated by the many possibilities that are offered by this software!
Record Audio
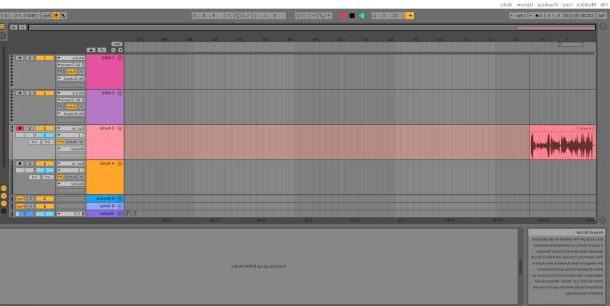
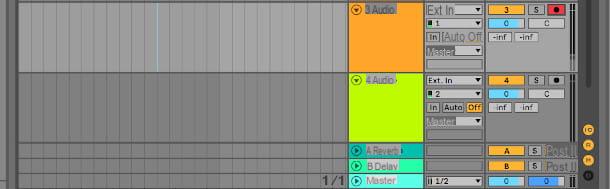
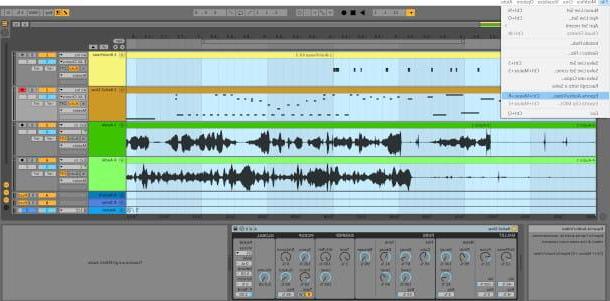
Record audio, playing an instrument external to the computer, such as a guitar for example, presents no difficulty on Ableton Live. The tracks in question, marked by the wording Audio, are automatically set up to acquire from external sources. Typically, if you don't have an external sound card, the default source is the microphone built into your computer, and it can be changed via the button Ext. In, present in correspondence with the audio track, in the area mixer of the center screen.
Before starting recording, always check that the audio track you are using is “armed”, that is, made available for the acquisition of a sound source. To do that, check that button Weapon Registration, present in the mixer to the right of each single track, is active (it turns red), otherwise click on it. You will notice that thelevel indicator, present right next to the Armature button, will dynamically start showing the input signal.
System now the metronomeby pressing the button characterized by one black and one white dot, at the top left of the Control Bar, to turn it on (it will turn yellow). Through the arrow beside the metronome you can change the settings to set it in time with your performance.
There are also three buttons in the Mixer, which help you determine how to monitor the recording while it is playing: they are the buttons In, Car e off. I advise you to set Car if you want to monitor through Live, but keep in mind that you will always encounter annoying latency. Press instead off in case you want to listen to it directly from an external sound card.
Now position yourself with the progress indicator at the beginning of the audio track by double clicking on the button Stop of the Control Bar. Then press the record button (the one with a black circle to the right of the Stop): if you have also selected the View Arrangement, you will see the characteristic shape of analog audio appear as the recording progresses in the track area.
When you're done, press the button again Stop or, if it is more convenient for you, the space bar keyboard. To listen to everything again, go back to the beginning of the song by double clicking on the button Stop and then press the key Play on his left.
Create a rhythm
You just recorded a great track, but would like to give it more support and create a rhythm adequate? Well, you will now discover how Ableton Live is extremely versatile in this respect as well. This program has in fact many interesting tools useful for the purpose, including Impulse, which you can access from the Browser section, to the left of the tracks, under the heading Instruments.
By clicking on the entry Impulse you will find a number of preset (i.e. a combination of preset sounds and effects). Choose one by clicking on the relevant item with the mouse to listen to a preview and then drag the one that convinced you the most towards the track area on the right, precisely in one of those marked as MIDI. The latter will automatically take the name of the chosen instrument.
If you have a MIDI keyboard the sounds of this preset can be played through its black keys. Otherwise, you can use the computer keyboard, using the keys in the middle row ASDF, but remember to activate it by pressing the button MIDI keyboard, in the upper right corner of the Control Bar (the one with thekeyboard icon).
Now, activate the metronome to play in time by clicking the button with a black and white dot located at the top left, in the Control Bar, so as to turn it on (it will turn yellow). You can change the relevant settings via the button with the down arrow, present on his right.
Ableton Live also offers a mode called quantization, which is an automatic adjustment of the running time based on a certain metric value. This value can be easily set from the menu Edit> Quantize in Recording. Here you can choose the reference value from one of those proposed (for example quarterfinals, Ottavi and so on).
It's time to start with registration. To do this, activate the mode Session recording in the Control Bar above the track area: it is a button with the shape of empty circle, not to be confused with the Arrangement Record button, which has a solid black circle as its symbol.
Always remember that when you move the mouse cursor over a button, the box at the bottom left is populated with detailed information about it. To finish the registration, once you have created yours loop of battery, press the button Stop in the Control Bar at the top.
Export projects
Have you finally completed your song and can't wait to export it to a file or CD for your friends to hear? Then follow the instructions in the next paragraphs and, in no time, you will have clear how export projects to Ableton Live. This procedure is, in fact, simpler than you think.
The thing I recommend you do first is to select the start and end points of the track. You simply need to access the View Arrangement (remember you can press the key Tab on the keyboard to change from one view to another) and click anywhere in the Tracks area. Now press the key combination Ctrl + A (cmd + a on Mac), which allows you to select all tracks, both vertically and horizontally.
Then access the menu Fillet, top left, scroll to the item Export Audio / Video and click on it. A window will open useful for defining some fundamental parameters. The first field you are interested in is Rendered Track, which should be enhanced with Master in order to produce a single file. It should automatically be present, but if it is not, click on the down arrow and choose the Master parameter from those proposed in the drop-down menu.
The next two fields, namely Starting point of the Render e Render Length, are characterized by three boxes in which the values of the beginning and end of the piece are inserted respectively. These were set automatically when you selected the tracks in the first step of this procedure.
Even the following parameters are already correctly set, unless you have special needs, for which I refer you to reading the complete manual of Ableton Live, present on this page. All you have to do is click on Export and, in the next window, choose the destination folder, then press the button Save. Wait the necessary time, which varies according to the length and quantity of tracks of your song (as well as the power of your computer) and finally you can enjoy the fruit of your creativity!
For any further information, I refer you to the Ableton FAQ page, with the answers to all the most frequently asked questions about the functioning of the program. If, on the other hand, you want an overview of other software to produce and record music, I absolutely recommend my article on programs to record audio.
How to use Ableton Live