Preliminary information

Before getting to the heart of this guide, it seems only right to make an overview of Google Photos: a Google service that, as already mentioned, allows you to synchronize photos and videos in the cloud and therefore always have them available on any device. But not only.
Google Photos is also a photo gallery with intelligent features that automatically catalogs photos and videos in order of importance, also integrating some features for photo editing and allowing the creation of movies, collages, animations automatically or manually.
If you are wondering how syncing on Google Photos works, I'll explain it to you in detail: you should know that Google Photos allows you to back up photos and videos in different formats. Archiving in High quality is limited to uploading photos at a maximum quality of 16MP, while for videos the resolution is up to 1080p (FullHD). This means that photos and videos with higher quality than indicated will be compressed to comply with these limits.
Since this type of backup can take time to upload to the cloud, you can also take advantage of the feature Express (Android only), which syncs photos with a maximum quality of 3MP and videos at a maximum resolution of 480p (Standard Definition).
In case you do not want to compress your photos and videos and therefore want to keep their original quality (for example photos taken at more than 16MP and videos in 4K), you can upload these multimedia contents in Original quality.
Obviously, depending on the format used, your free storage space by 15GB of your Google account will be reduced. Only the photos and videos in High quality ed Express synchronized before June 1, 2021 are not counted towards the space thresholds of your account.
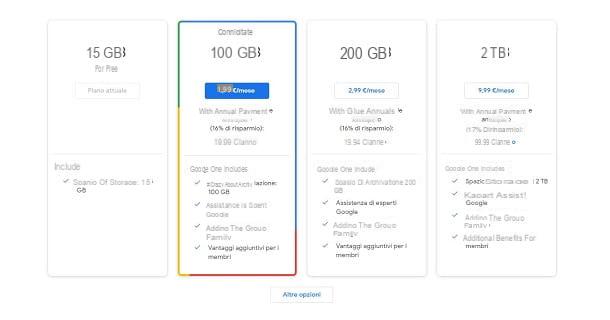
Alternatively, if 15GB of free space isn't enough, you can purchase a Google One subscription. Prices for cloud storage start at 1,99 euro / month to 100GB, 2,99 euro / month to 200GB e 9,99 euro / month to 2TB. Since Google services come with initial free storage (15GB), you can use the service in original quality until the free space is used up.
To use Google Photos you must have a Google account. If you use a smartphone Android, you will probably already have a Google account available, as you will have associated or created it during the initial configuration phase of your device, since it is also used for access to the Play Store; you can therefore also use it for Google Photos.
If, on the other hand, you use a device iOS / iPadOS and this is the first time you use Google services, I refer you to my guide on how to create Google accounts. You will find all the information you need to perform this preliminary procedure. If you already have a Google account, however, you can safely continue reading: in the following chapters, I will explain in detail how Google Photos works on all devices for which it is available.
How Google Photos works on Android
A device is possible Android, you should find the Google Photos already available by default on your smartphone or tablet. If not, you can download it from the Play Store, via this link.
To start it, search Google Photos in the list of apps installed on your device and presses on its icon. Once opened, if you have not yet logged in with your Google account, enter your login credentials.
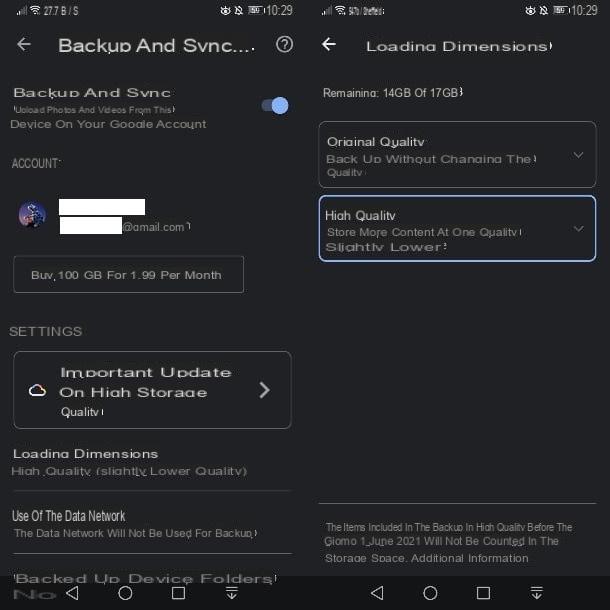
Once this is done, you will be asked if you want to enable the backup feature immediately or postpone it later. In case you skipped this step, on the main app screen, tap yours miniature, located at the top right, and select the item Photo settings, to open the app settings menu. Verify that the entry Backup and synchronization is active and, if not, press on it and move up ON the appropriate lever next to the wording of the same name.
Also, if you wish, by pressing on the item Device folders backed up, you can enable the synchronization of specific folders on the device, to back up the photos also contained in other folders, such as the one with WhatsApp or Instagram photos. To the item Dimensioni cartoon, you can set the quality of the photos, as I explained to you in the introductory chapter.
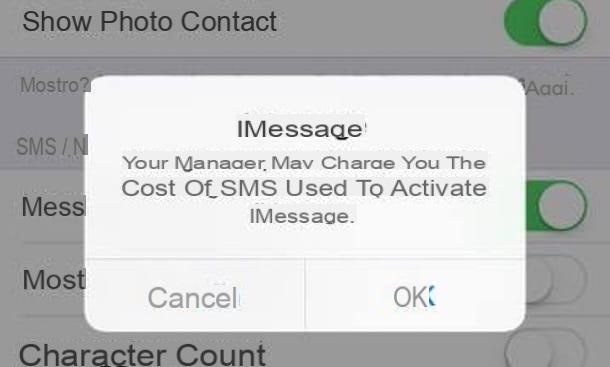
Instead, make sure that data synchronization is disabled, to avoid unwanted charges if you exceed the data traffic included in your SIM. To do this, click on the item Use of the data network and make sure they are set to OFF the levers next to the items Back up your photos using cellular data, Back up your videos using cellular data ed Back up while roaming.
In the settings panel you can also press on the item Free X GB, to remove photos and videos that have already been backed up from memory.
How Google Photos works on iPhone
You can use Google Photos even if you have a iPhone or iPad. The Google app for cloud storage can, in this case, be configured as an alternative to iCloud, the default cloud platform of Apple mobile devices, which also offers a service dedicated to backing up photos and videos.
You can use Google Photos su iOS (starting from version 10 of the operating system) or on iPadOS, by downloading the app from the App Store. Once downloaded and installed correctly on your device, start it through its icon on the home screen.
At this point, allow Google Photos to access your photos by responding affirmatively to the request shown on the screen. Once this is done, log in with your Google account, if you have never configured one on your iPhone / iPad, and press on the item Back up, to immediately activate synchronization; skip this step, to customize the configuration later.
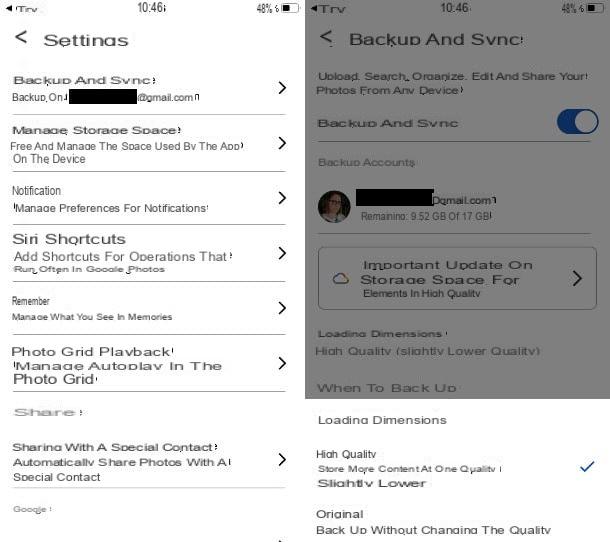
In the latter case, press on your thumbnail at the top right and press on the item Google Photos settings, to access the service configuration panel. Then press on the item Backup and synchronization and move up ON the appropriate lever that you see.
At this point, choose the type of backup you want to make by clicking on the item Dimensioni cartoon located a little further down, and choosing between High quality or original (I told you about the differences between the two in this chapter of the guide). Also, if you don't want the data network to be used for backup, just move to OFF the levers next to the words Use cellular data to back up your photos e Use your data network to back up your videos.
At this point you will have finished configuring the application and you will only have to wait for your media library to be backed up. The photos that have been backed up are stored online and you can, therefore, possibly remove them from your device memory. You can do this by pressing the button Free up space, which you find by reaching the voices Google Photos Settings> Manage Storage.
How Google Photos works on PC
Being a cloud storage tool for multimedia content, Google Photos it is also easily accessible from a PC, both to view them and to upload them as well. The operation of Google Photos is very similar to that of the app for Android and iOS / iPadOS.
Going into more detail, you have two options for use Google Photos on PC: use the web panel, through which you can upload photos and videos manually and view the content already present on the cloud, or the appropriate one desktop client, for automatic content synchronization.
To use Google Photo to Web, first connect to the main page of the service and log in with your Google account (the same one you used to access the app). If you click on the icon (I.e., you will have access to the panel through which you can adjust the quality of the uploaded photos.
What you need to do is choose whether to upload photos using the settings original or High quality, which I told you about in this chapter. Once this is done, you can upload photos and videos by pressing on the item Charge which is located at the top right.
If you have tons of photos and videos that you don't want to upload manually, as it would take too long, you can download the official Google desktop client, Backup and Synchronization, which uploads content automatically. All you have to do is reach this link and press, in the section Backup and synchronization, on the buttons Download e Accept and download.
When the download is complete, if you use Windows, april il .exe file ottenuto, awarded his Yes, wait for the client installation process to complete and click on Close, to exit the installation screen. Up macOS, instead, double-click the .dmg file obtained and drag the Google client icon to the folder Applications from the Mac.
After following the procedures described above, it's time to configure the desktop client for uploading your media files. Then start the newly installed tool via its quick start icon and, in the screen that is shown to you, press the button Start and log in with your account.
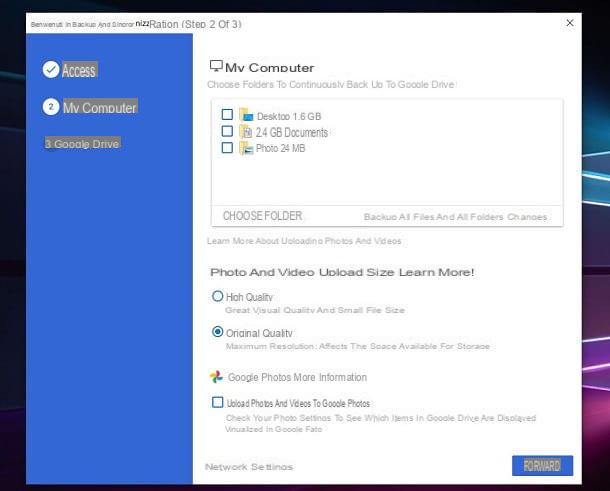
After that, you need to select the folders you want to sync. Press the button OK and, in the screen that is shown to you, put a check mark on the box Upload photos and videos to Google Photos and set the upload quality, to be chosen from Original quality e High quality, as I explained to you in my introduction.
Now, choose the folders to include in the synchronization, by selecting them from the top box or by locating them on the PC, using the button Choose folder. At this point, press the button NEXT and, in the next section, decide if you also want to sync your Google Drive. In this case you don't need it, so you can also disable this feature: the choice is yours. Then press on Start, to start backing up your photos.
How Google Photo works